How to Insert Silence Before and After Track Audacity
Layering and Panning
Creating a Project
Importing Files
We'll be extracting our sounds from the allRecordings file and placing them in our new project, using a variety of audacity's actions. Here's a capture of the sound signal of our allRecordings.aiff file:

You'll see a couple small waves in the file, this is where there's deviation (or louder recorded noise) compared to the rest of the file (i.e. the silence). You'll also notice, too, that the waves are exceptionally small... This is because the sounds were recorded at with a Powerbook's Internal Mic in a noisy environment; furthermore, because of the noisy environment, the microphone sensitivity was turned way down to try and reduce the amount of background noise in the recording. So, all said and done, the recordings are fairly clear (but definitely not Pixar quality) and will suffice for us to learn how to work with layering and audio manipulation in Audacity.
1. Open audactiy and start a new project (FILE > NEW) and then open the file: allRecordings.aif (FILE > OPEN).
In the empty project, add a new Audio Track (PROJECT > NEW AUDIO TRACK).

2. Select the first sound in our recording and paste it into the empty track. You can select portions of a sound file using the mouse (drag a timed section and paste it in).
Adjust the track level and pan settings so that the sound comes out of the left channel and is slightly quiet.
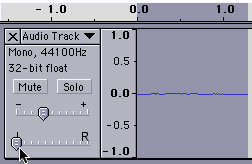
3. Create a new audio track, select the next sound (in allRecordings), paste it into the new track.
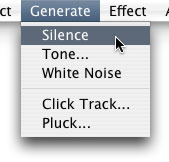
With the new sound pasted in, you'll want to create some silence in front of it so that it plays at the appropriate time. Drag a selection of time on the second track and then generate silence (GENERATE > SILENCE).
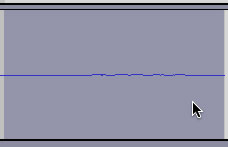
4. You'll see that a single solid line is put in front of your sound... you can add more silence, or delete some (by selecting a portion of the timeline and hitting DELETE) so that the sound plays at an appropriate time (i.e. not too soon or not too long after the first sound).
Adjust the track level and pan so that the sound comes out from the RIGHT channel.
5. Repeat the process above to insert the next sound (which should say "i'm walking away from you now") into a third audio track in your project.
Add two more copies of the same sound at the end of the track so that the voice repeats itself 3 times.
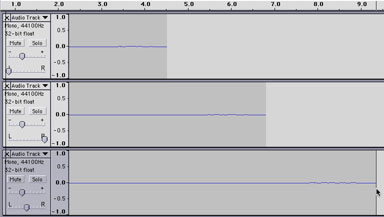
6. Zoom into the end of the third track and select the portion with the sound waves. Then, choose the ENVELOPE tool from the toolbox (top-left).
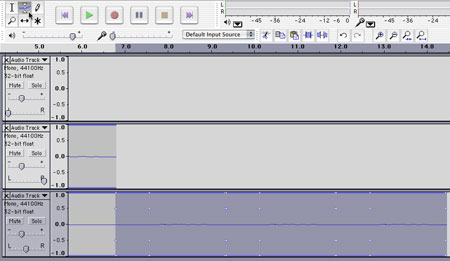
7. Adjust the levels using the white nodes that appear along your selection. Simply click and drag (up or down).
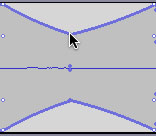
8. Continue doing this until the end of the track, try and get a gradient... also, just get used to the way audacity works with levels (audacity is a very simple program, needless to say... it's interactivity isn't as robust as audition or protools).

9. The sounds in allRecordings are meant to be linear... so continue adding them, focusing on adjusting the timing, levels and pacing of your samples across tracks. You can position some of the samples to overlay one another, making it sound like one person is talking from 3 / 4 different places at once.
10. When you're finished with allRecordings, open the music file spies.aif, import it into a final audio track and adjust its levels so you can hear the voice speaking overtop of everything else.
Try cutting and fading it out as an ending to this project.

11. Save the file as a .WAV (FILE > WAV) so that it can be played back on your PC.

12. This is what the final .aup project looks like for the sample final.WAV that comes with this weeks source files.

Back to top
How to Insert Silence Before and After Track Audacity
Source: https://www.sfu.ca/~tutor/techbytes/Audacity/au2.html