How to Install the Beast on Kodi 16.1
You are here: Home / Kodi / How to Install The Beast Kodi Build on FireStick (2021)
In this guide, I am going to take you through the step by step process to install The Beast Kodi build on Kodi 18.9 and Kodi 17.6. The method used in this guide works on all the Kodi compatible devices including FireStick, Nvidia Shield, Windows PC, Android, etc.
 Add-ons are the lifeline of Kodi. This immensely popular media player wouldn't be as popular if not for the free and abundantly available add-ons. The Kodi addons are the gateway to the world of innumerable free movies, shows, anime, live TV, sports, and whatnot. That's incredible! Isn't it?
It certainly is, but there is one little drawback. While there are dozens of add-ons out there, you need to install them individually depending upon the type of content you wish to watch. And, since there are so many of them to pick from, you may end up confused. In the beginning, when I had just started using Kodi, I would install any add-on that came my way. This practice often left my Kodi interface cluttered and I had great difficulty reaching out to the movie or show I wanted to stream. Only after a while, I realized I could take care of all these problems by installing a good quality Kodi build.
I am going to introduce you to The Beast Kodi build in this guide and show you how to install it. The Beast is undeniably one of the best Kodi builds you could get. This build comes pre-installed with some of the most popular Kodi addons so that you don't have to go out looking for them individually. Since The Beast picks the best addons for you, there is no need for you to worry about which ones to go for. It has a neat, clutter-free, and well-organized interface that lets you access all you want with just a touch of the button.
The Beast build is compatible with both the touch and remote-controlled devices and computers/laptops. I have been using this build on FireStick, which is a remote-controlled streaming stick and also on my laptop. I have never had any complaints as far as interaction and navigation are concerned.
Let us now learn how to install The Beast on FireStick and all the Kodi supported devices.
How to Install The Beast Kodi Build
I will show you how to install The Beast on Kodi.
Attention, Kodi Users!
Kodi Addons and builds offer unlimited streaming content, but could also get you into legal trouble if caught streaming free movies, TV shows, or sports. Currently, your IP is visible to everyone. Kodi users are strongly advised to always connect a VPN while streaming online. A good Kodi VPN hides your identity, bypasses government surveillance, geo-blocked content, and ISP throttling (which also helps in buffer-free streaming).
I personally use ExpressVPN, which is the fastest and most secure VPN. It is very easy to install on any device including Amazon FireStick. You get 3-months free and save 49% on its annual plans. Also, it comes with a 30-day money-back guarantee. If you are not satisfied, you can always ask for a refund.
Click HERE to get 3-months free and save 49% on ExpressVPN
Read: How to install and use a Kodi VPN
Before we get started, we will have to prepare Kodi for the installation of third-party builds by allowing Unknown Sources.
- Go to Kodi home-screen and click the 'Settings' option on the top right. Now, click 'System Settings' on the next screen if you use Kodi 17.6 or click 'System' if you have Kodi 18
- Select 'Add-ons' on the following screen and on the right move the 'Unknown Sources' switch to the ON position (image below)

- The following warning message will appear, which you can easily ignore as The Beast Kodi build we are going to install is 100% safe.

Let us now install the beast Kodi build. I am going to divide the process into three steps as follows:
Step 1: Add the Source to install the Beast repo from
Step 2: Install the Beast repo from the added source
Step 3: Install the Beast Kodi build from the repo
Make sure that you follow each step carefully.
Step 1: Add the Source to install the Beast repo from
Here is what you need to do to add the source:
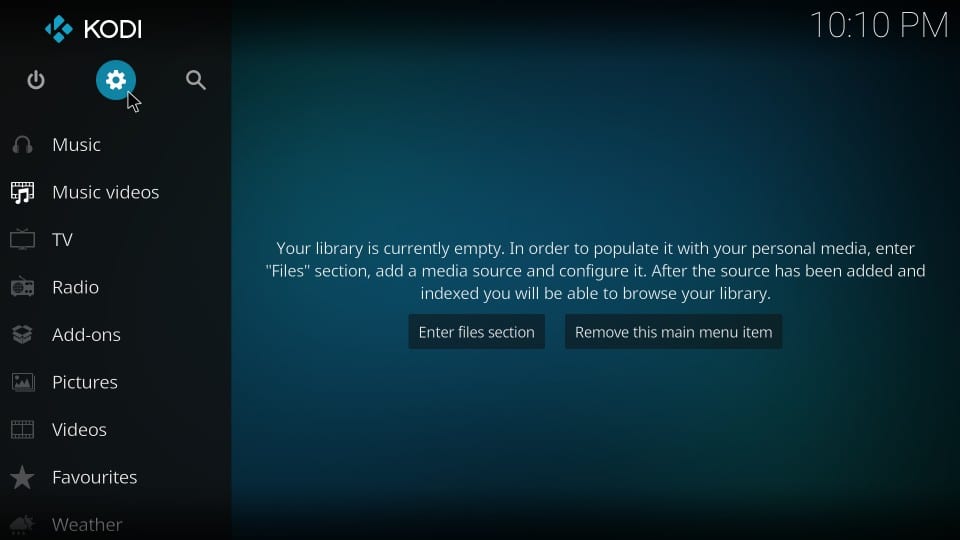
1. When you are on the Kodi home screen, click the Settings icon on the top right
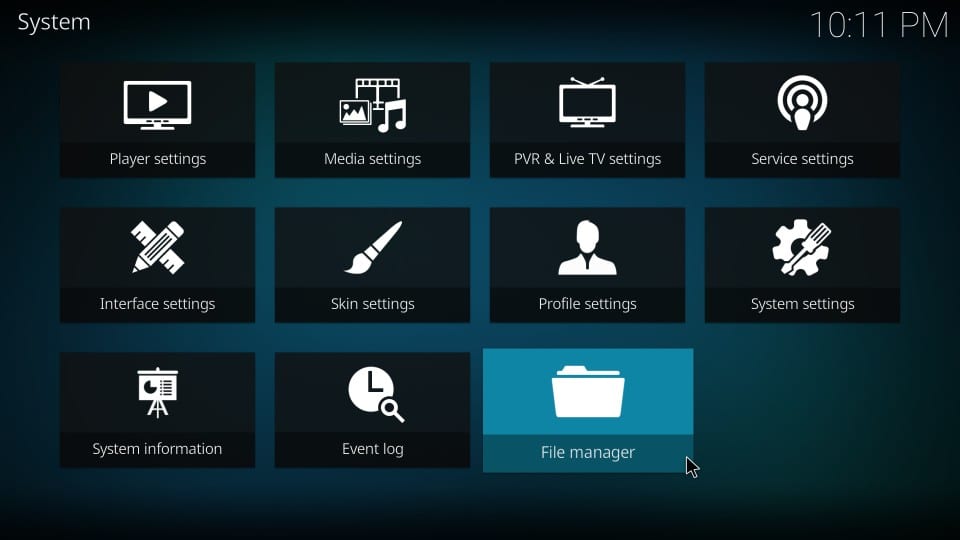
2. Now, click 'File Manager' from the list of the available options
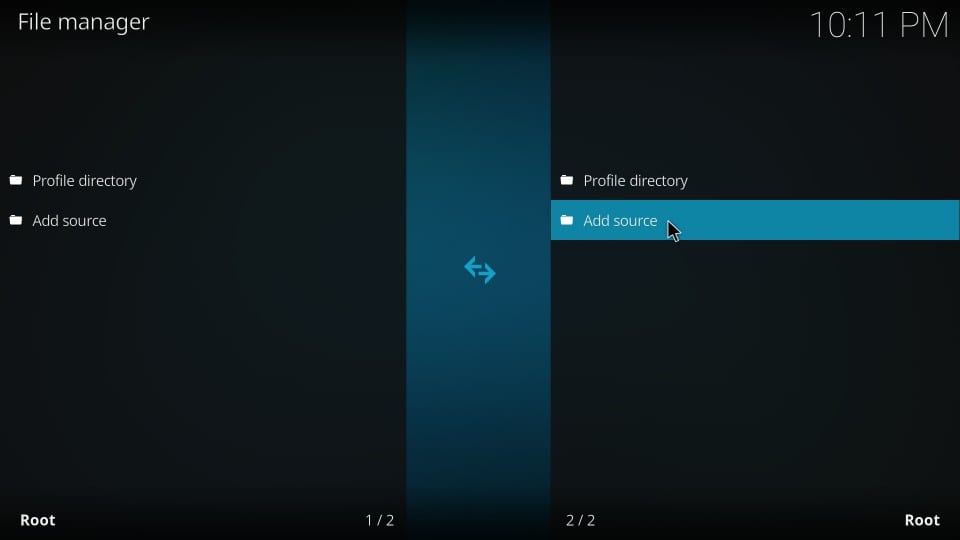
3. Click 'Add source' on the following screen
4. You should now see this window titled 'Add file source'. Here, click <None> as shown in the image below
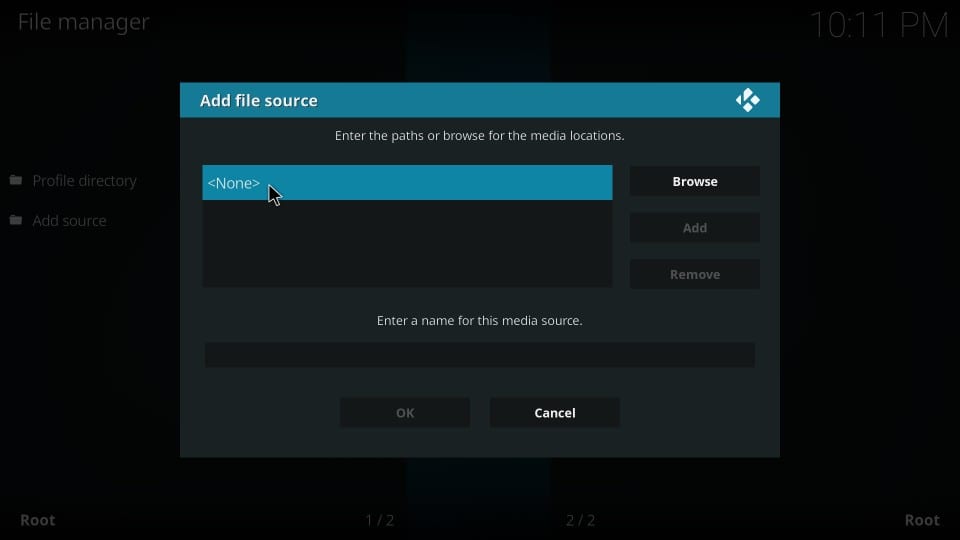
5. Enter the following URL in the field as shown below: https://thebeastbuild.com/download
Please mind the typos and type in the URL correctly. Usually, it is the typos that cause trouble during installation.
If you are installing the Beast Kodi build on a smartphone or computer, simply copy and paste the URL. But, if it is the Beast Kodi Fire Stick you are installing, you will need to type in the complete address using the remote (unless you are using the Fire TV app available on Android and iOS).
Click OK

6. Enter a name you would like to identify this source within the 'Enter a name for this media source' field. I am going to choose the name 'beast' for it
Click OK to add the source.

The source has now been added. Let us now install the beast Kodi repo.
Step 2: Install the Beast Repo from the Added Source
Follow the steps below to install the repo:
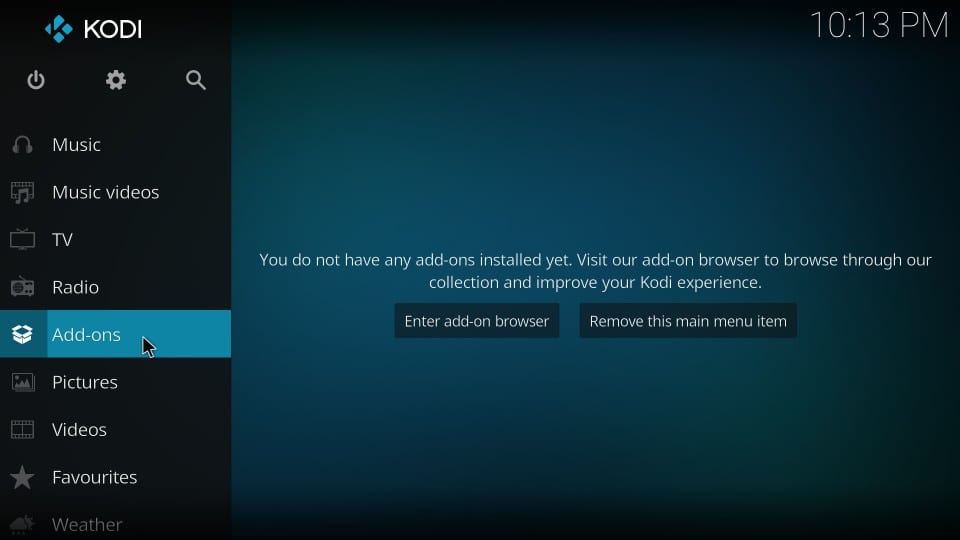
1. Return to the Kodi home-screen and click 'Add-ons'
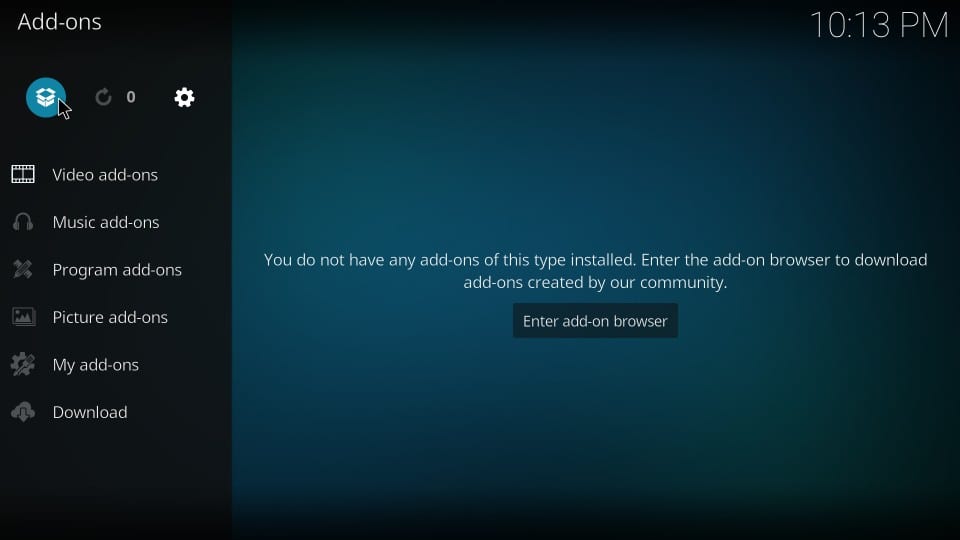
2. Click the 'Package Installer' option on the top right of the next window
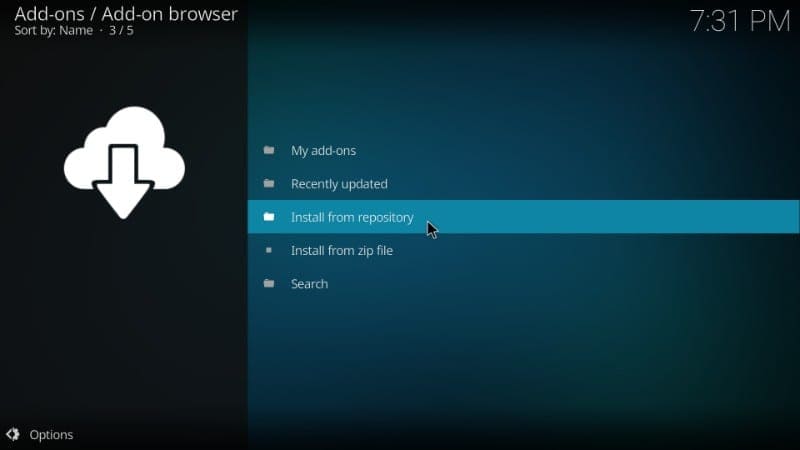
3. Now click 'Install from zip file' on the following window

4. You should now see 'Beast' (or the name you gave to the source earlier) on the list. Click it!

5. Now, you must see a Zip file in the next window. It is named something like thebeast.repository.zip. Click the file to continue.

6. Now, wait for the 'Beast Repository add-on installed' notification to slide out from the top right (see the image below.) When you see this notification, the Beast repo has been installed.

Now we will learn how to go about with the beast Kodi download.
Step 3: Install the Beast Kodi Build from the Repo
Here are the steps to install the build.
1. From the Kodi home-screen, click 'Add-ons' and then click the 'Package Installer' icon like before. Now, click 'Install from repository'
2. What you want to do next is click the 'Beast Repository'

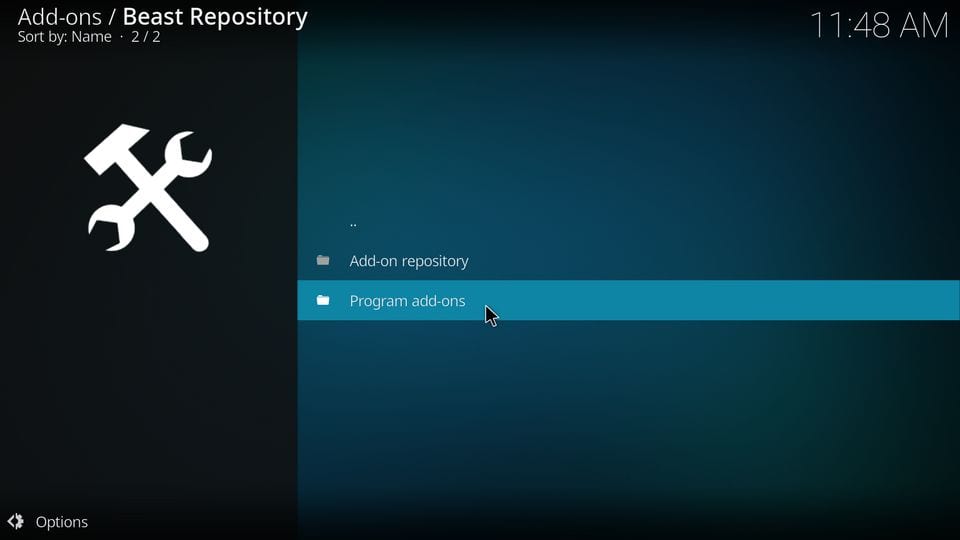
3. Click 'Program Add-ons' next
4. Now, go ahead and click 'The beast Wizard U.S.' version. If you live in the UK or anywhere close to the UK than the US, click the UK version instead.

5. Click the 'Install' button on the bottom-right of the next screen

ClickOK when this prompt is displayed

6. After about a minute, you should see 'The Beast Wizard U.S. Add-on installed' notification.

7. If this popup is displayed, press the back button or click Continue

If you see the following pop-up, click 'Ignore'

8. Now, go to the Kodi home-screen one more time and navigate to Add-ons > Program Add-ons. You will find The Beast Wizard here. Click the wizard to open it

9. Click Continue when this prompt is displayed

10. Now, go to the following website on your computer or mobile browser: www.development-tools.net
Enter the code displayed in the prompt on Kodi as you see in the image below (in my case the code is 8399335). You need to enter this code on the webpage that you opened in your browser.
Follow the instructions on the page to generate the token
ClickEnter token

11. Enter the token you obtained from the webpage in the previous step on this Kodi screen

12. The Beast Build Wizard is not displayed. Next, click Builds in the top-left

13. Click The Beastbuild in the left column
Note: If you do not see The Beast build in the left column, click the Close button in the top-right corner and open the Beast Wizard again

14. Click Fresh Install on the right side of the same window

15. Click Yes next

16. Wait while The Beast build downloads and installs. It will take several minutes.

17. When the build has installed, click OK to force close Kodi

18. Now, go ahead and restart Kodi. The start-up screen will change from the default to the following

Even though The Beast build transforms the Kodi interface dramatically and completely changes how you interact with it, it will not take you too long to get used to it.
Before you start streaming with Kodi Addons or Builds, I would like to warn you that everything you stream on Kodi is visible to your ISP and Government. This means, streaming copyrighted content (free movies, TV shows, live TV, and Sports) might get you into legal trouble.
Thankfully, there is a foolproof way to keep all your streaming activities hidden from your ISP and the Government. All you need is a good VPN for Kodi. A VPN will mask your original IP which is and will help you bypass Online Surveillance, ISP throttling, and content geo-restrictions.
I personally use and recommendExpressVPN, which is the fastest and most secure VPN. It is compatible with all kinds of streaming apps and devices.
NOTE: We do not encourage the violation of copyright laws. But, what if you end up streaming content from an illegitimate source unintentionally? It is not always easy to tell the difference between a legit and illegal source.
So, before you start streaming on Kodi, here's how to get VPN protection in 3 simple steps.
Step 1: Get the ExpressVPN subscription HERE. It comes with a 30-day money-back guarantee. Meaning, you can use it free for the first 30-days and if you are not satisfied with the performance (which is highly unlikely), you can ask for a full refund.
Step 2: Click HERE to download and install the ExpressVPN app on your streaming device. If you are using a FireStick, I have given the exact steps starting with Step 4 below.
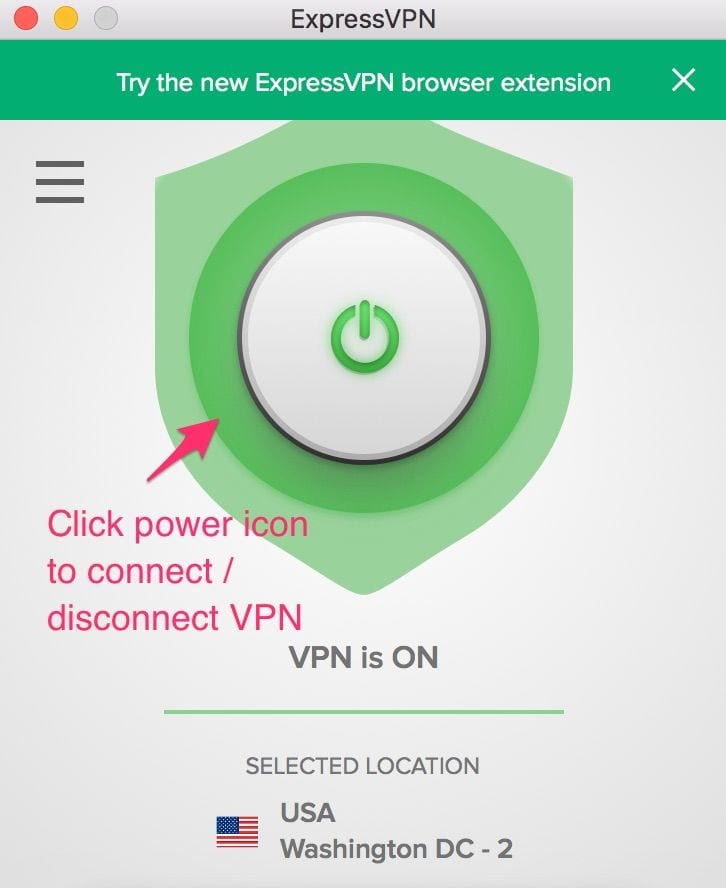
Step 3: Click the Power icon to connect to a VPN server. That's all. Your connection is now secure with the fastest and best VPN for Kodi.
The following are the steps to install Kodi VPN on your Fire TV devices. If you have other streaming devices, follow Step 1-3 above.
Step 4: Subscribe to ExpressVPNHERE (if not subscribed already) .
Step 5: Go to Fire TV Stick home screen. Click Find followed by Search option (see image below).
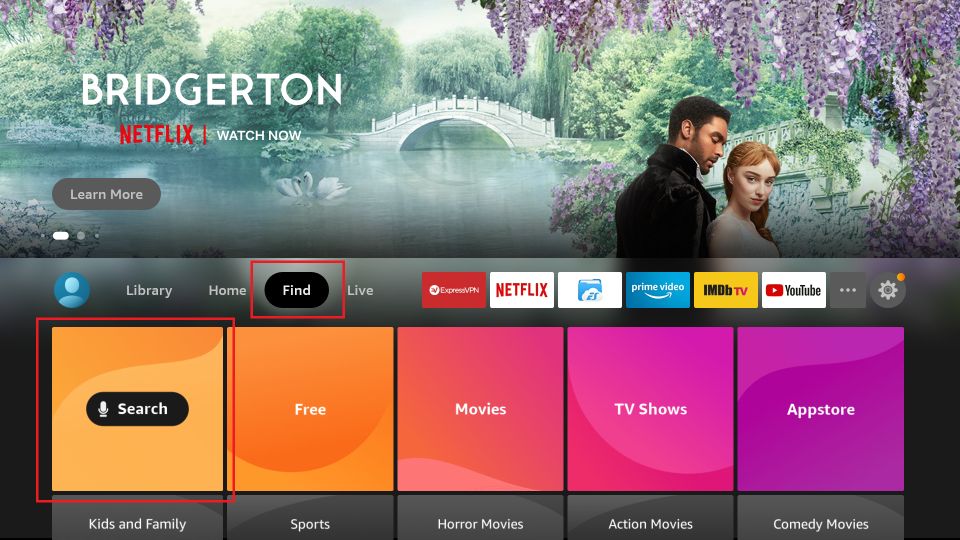
Step 6: Type Expressvpn in the search bar and select when it shows up.
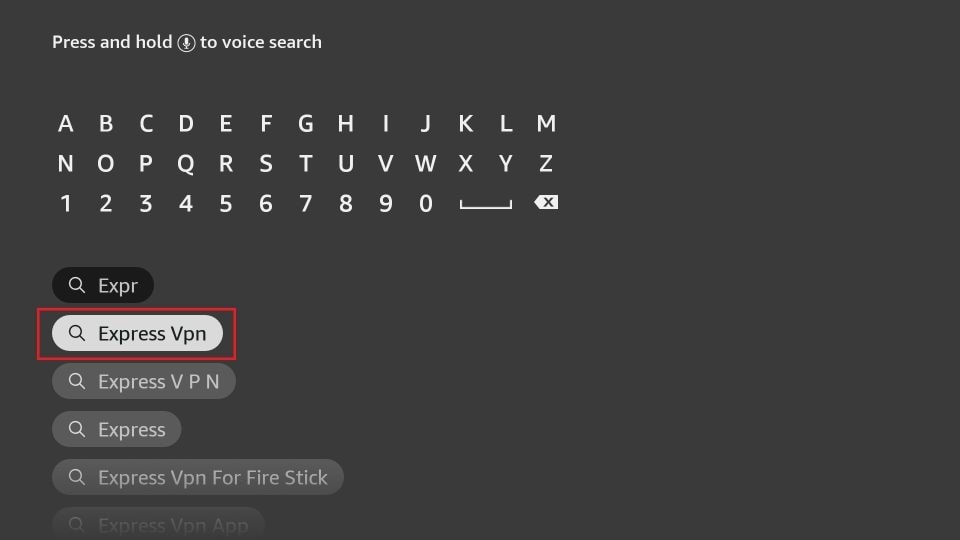
Step 7: Click Download.
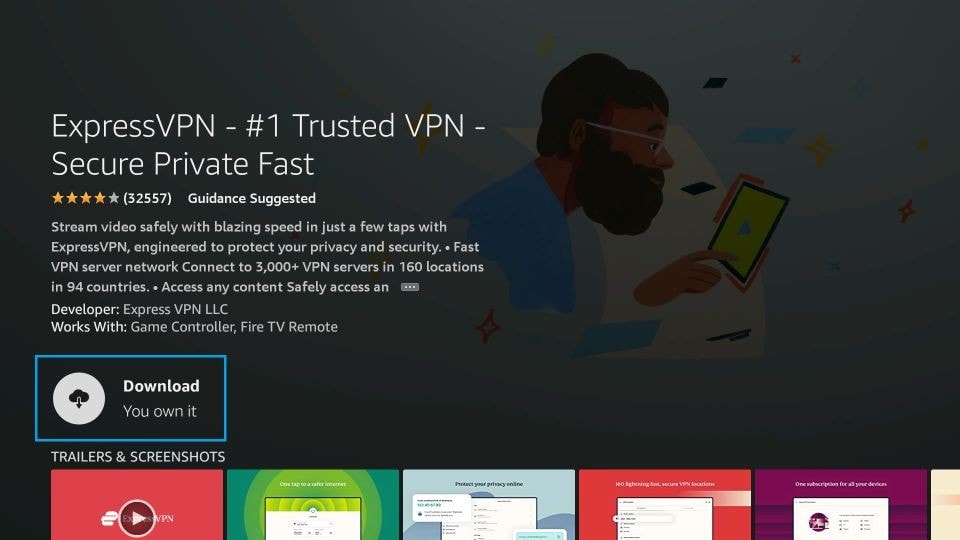
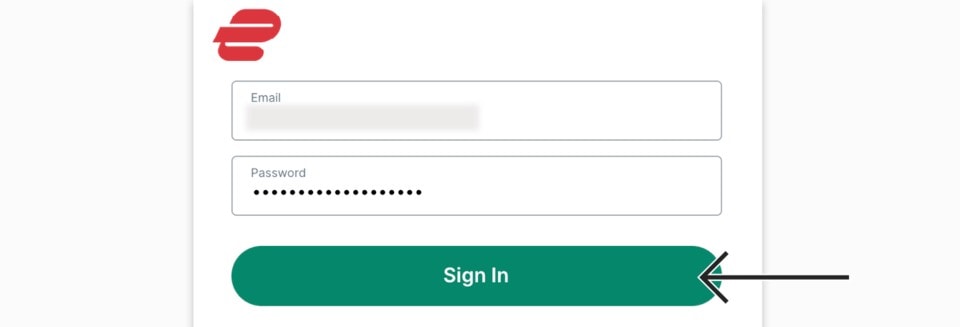
Step 8: Open the ExpressVPN app and Sign in using the email ID and password that you created while buying the ExpressVPN subscription.
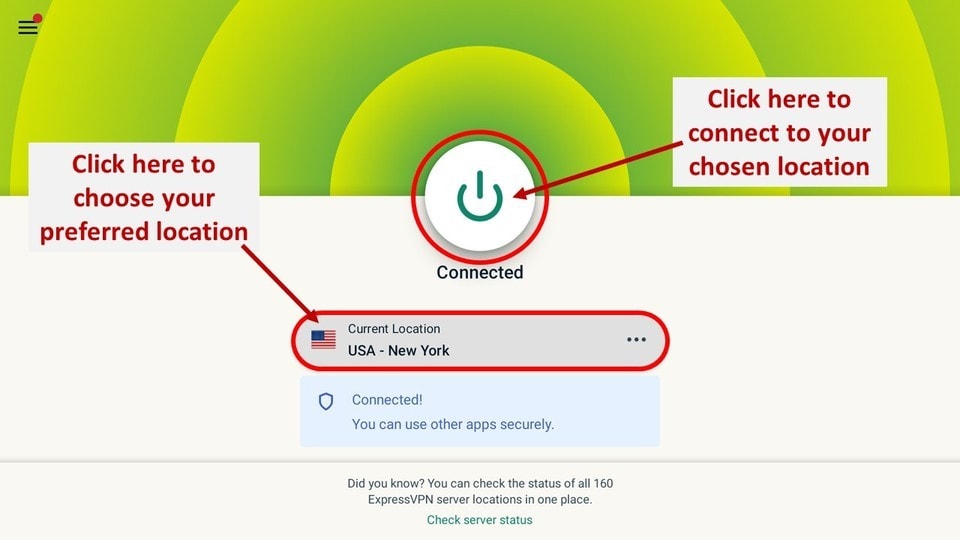
Step 9: Click the Power icon to connect to a VPN server. That's all. Your FireStick is now secured with the fastest VPN.
Conclusion
With a library of the most sought-after addons of today, The Beast Kodi build spares you the efforts and hassles of installing them individually. The only drawback I have found is that it requires you to sign up on the web portal. Even though it is one additional step, it doesn't take too long. The developers have ensured that the registration and verification process is quick. I have also noticed that Kodi Beast build is just about as stable as any other. Since this build is absolutely free, I reckon there is absolutely no harm in giving it a try. You can always restore Kodi to its default. And who knows! There is a fair chance you might end up loving and keeping this build.
Related:
- How to Install Kodi Addons on Builds
- How to Install Multiple Kodi Builds
- How to Install the Joker Kodi Builds
- How to Stop Buffering on Kodi
Legal Disclaimer - FireStickTricks.com does not verify the legality or security of any add-ons, apps or services mentioned on this site. Also, we do not promote, host or link to copyright-protected streams. We highly discourage piracy and strictly advise our readers to avoid it at all costs. Any mention of free streaming on our site is purely meant for copyright-free content that is available in the Public domain. Read our full disclaimer.
Disclosure - FireStickTricks.com is reader-supported blog. When you buy a product through links on our site, we may earn commission. Learn More
How to Install the Beast on Kodi 16.1
Source: https://www.firesticktricks.com/the-beast-kodi-build.html